


Overview
This guide shows how to configure a TP Link Omada controller in order to integrate it with SpotOn.
Prerequisites
Please make sure you have the latest version of Omada Controller and AP firmware.
For TP Link Omada deployments to work with SpotOn’s integration the following is required:
Because the Omada controller initially serves the portal and redirects to SpotOn’s servers, the Omada controller must be running at all time. If you use the Windows desktop controller version on a normal computer, it is important this computer is always turned on and running Omada. If you shut down the computer running the controller the guest portal will NOT work!
Equally important is that the Omada controller is reachable by SpotOn's servers from the internet. The specific port used for this is TCP 8088. This means that this port needs to be opened or forwarded in the firewall. It also means that the controller should be behind a static IP (or use dynamic DNS) so that SpotOn's server can use that IP/hostname to connect to the controller.
You will require a RADIUS password and a Custom URL from the SpotOn Support team. Chat with us, send an e-mail ([email protected]) or give us a call (050 211 5201).
SSID setup
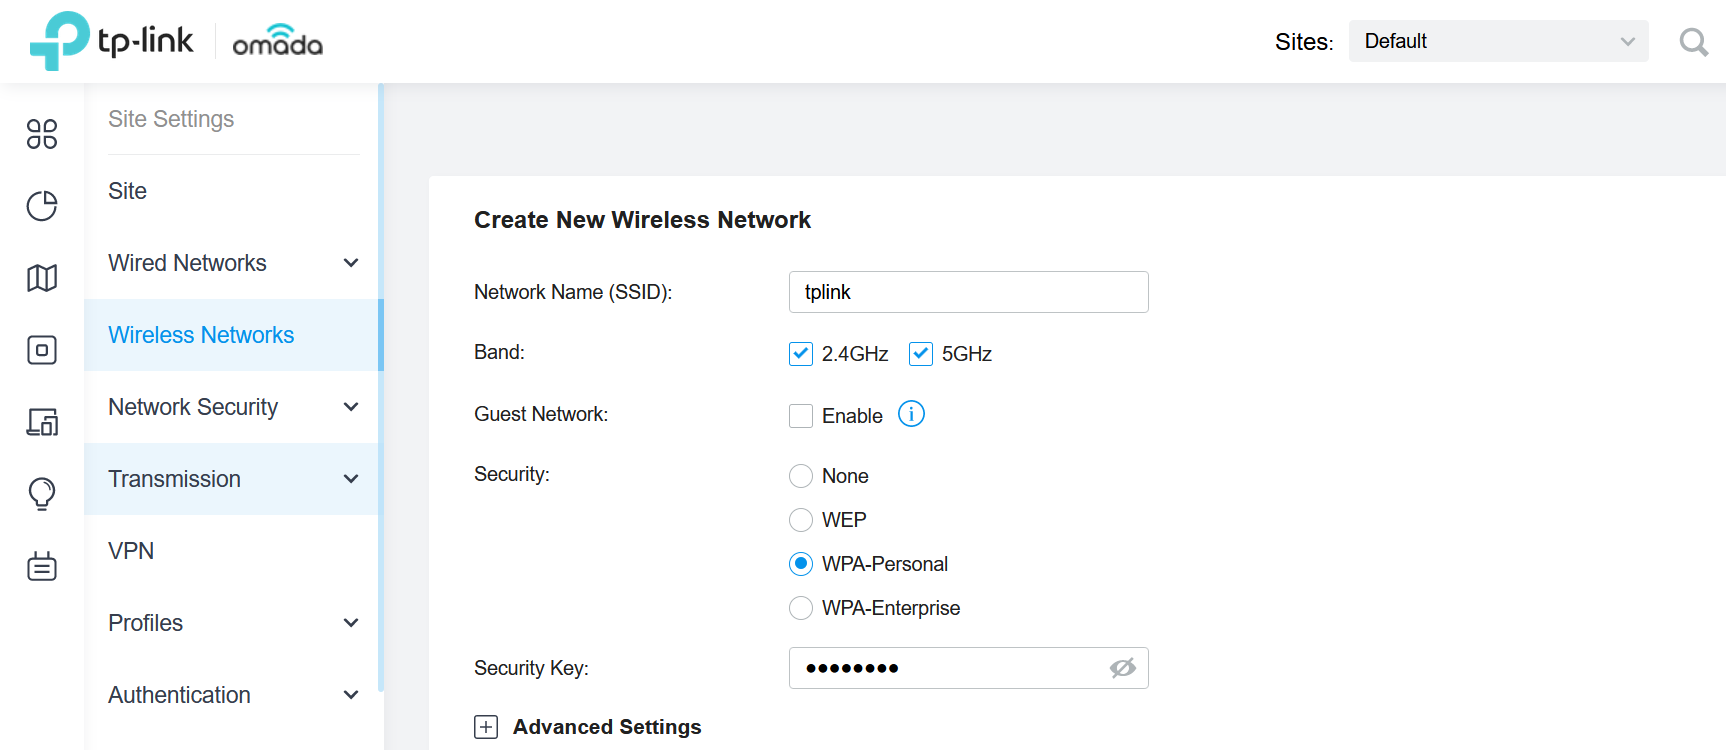
To set up your SSID, go to Settings > Wireless Networks > Create New Wireless Network. Enter your SSID and security settings.
Portal configuration
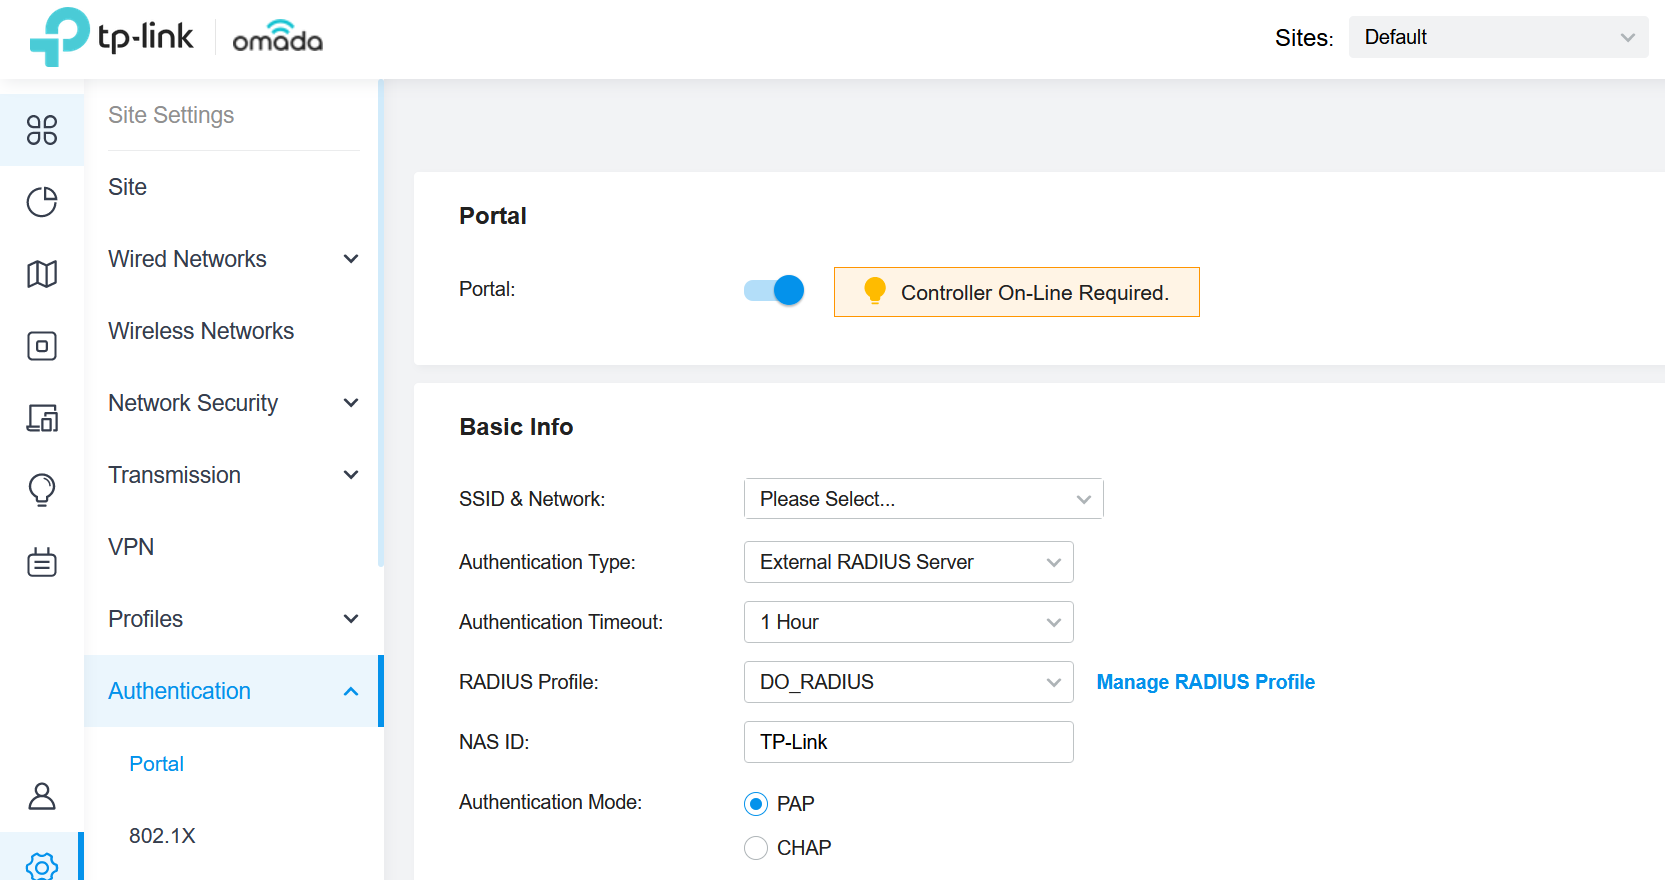
Go to Settings > Authentication > Portal. Make sure the portal option is turned on. In SSID & Network select your SSID. Authentication Type should be External RADIUS Server. Authentication Timeout will be as per your requirement. In RADIUS Profile select Create New RADIUS Profile. Create a profile for SpotOn's RADIUS based on the following parameters:
RADIUS Auth-server
IP-address: 94.124.94.160 ; Port: 1812RADIUS Accounting Server
IP-address: 94.124.94.160 ; Port: 1813RADIUS password / Shared Secret:
Ask the SpotOn team for the RADIUS passwordAuthentication mode should be PAP.
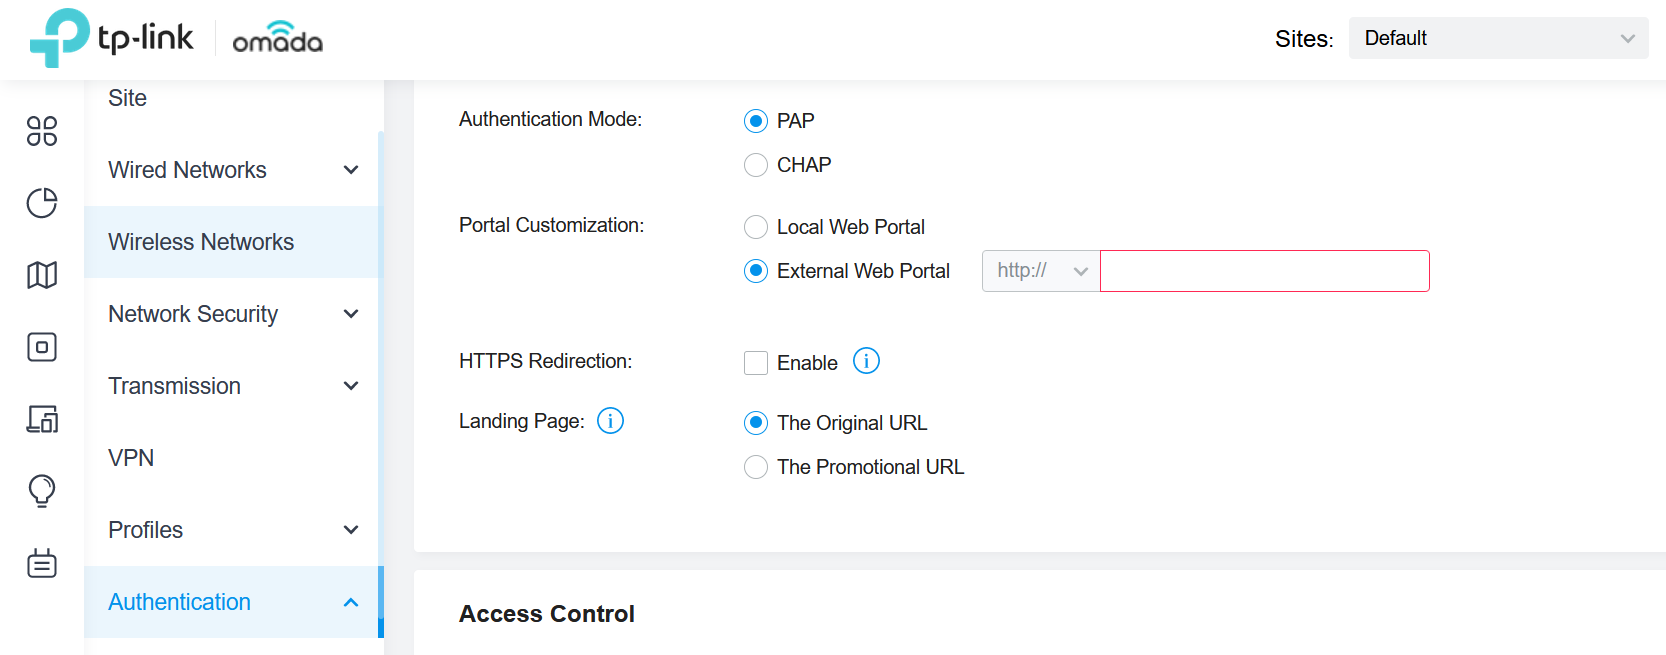
In Portal Customization select External Web Portal and enter your custom URL shared by SpotOn support team (with scheme https). Other settings should be left at their defaults.
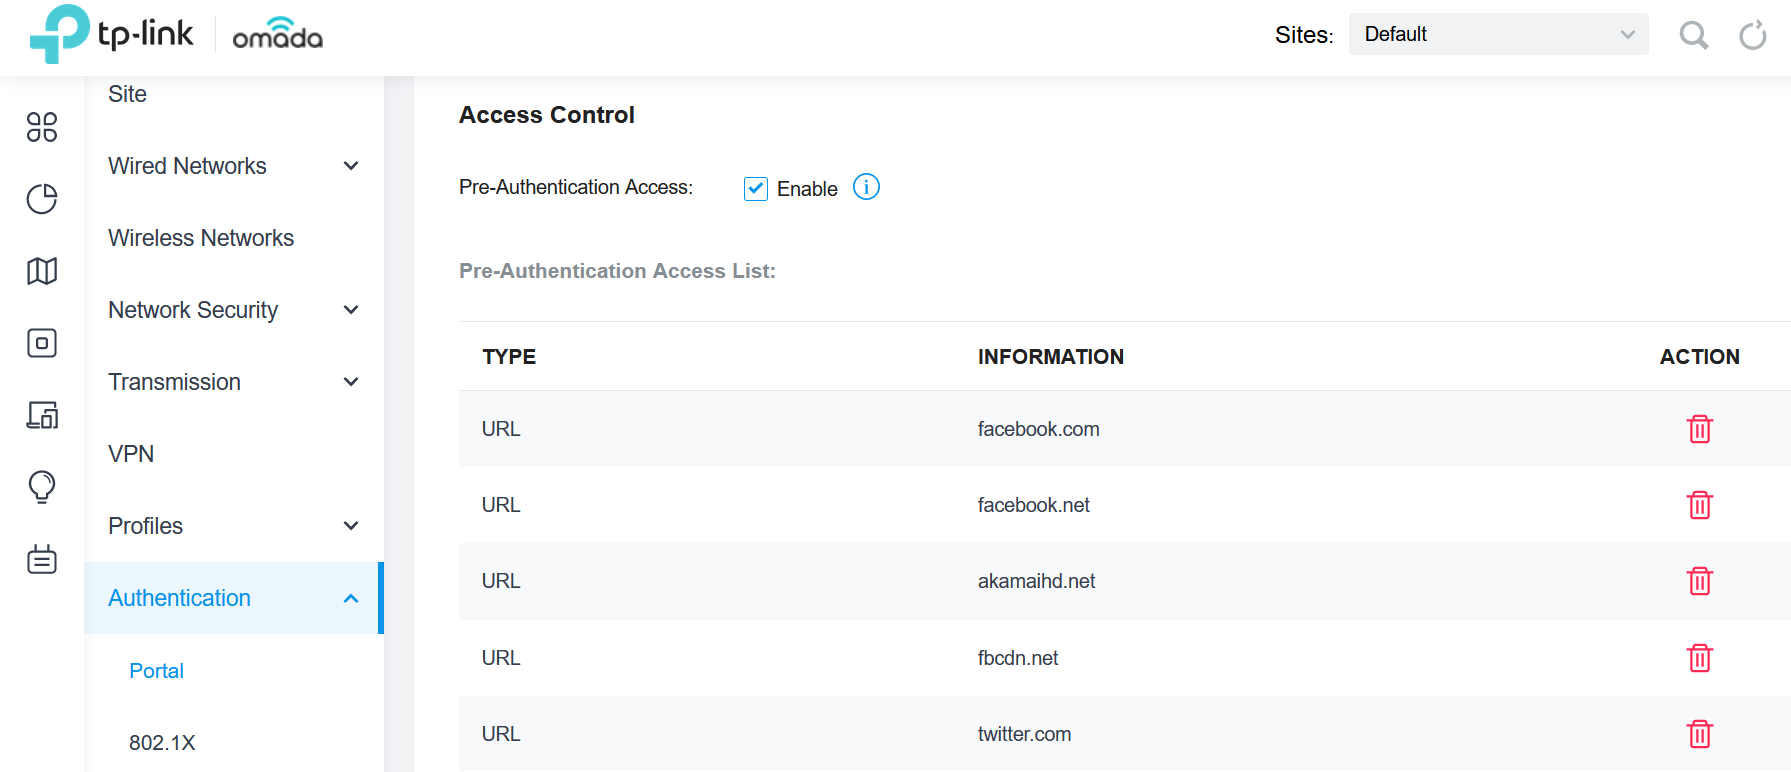
In Access Control section check Pre-Authentication Access and enter the required entries.
Press Apply at the bottom of the page to save these settings.